Monday, January 28, 2013

21, Duck, and Wine


Happy Birthday to ME…Happy Birthday to Me…Happy Birthday dear MEEEEE…Happy Birthday to ME!  Well 
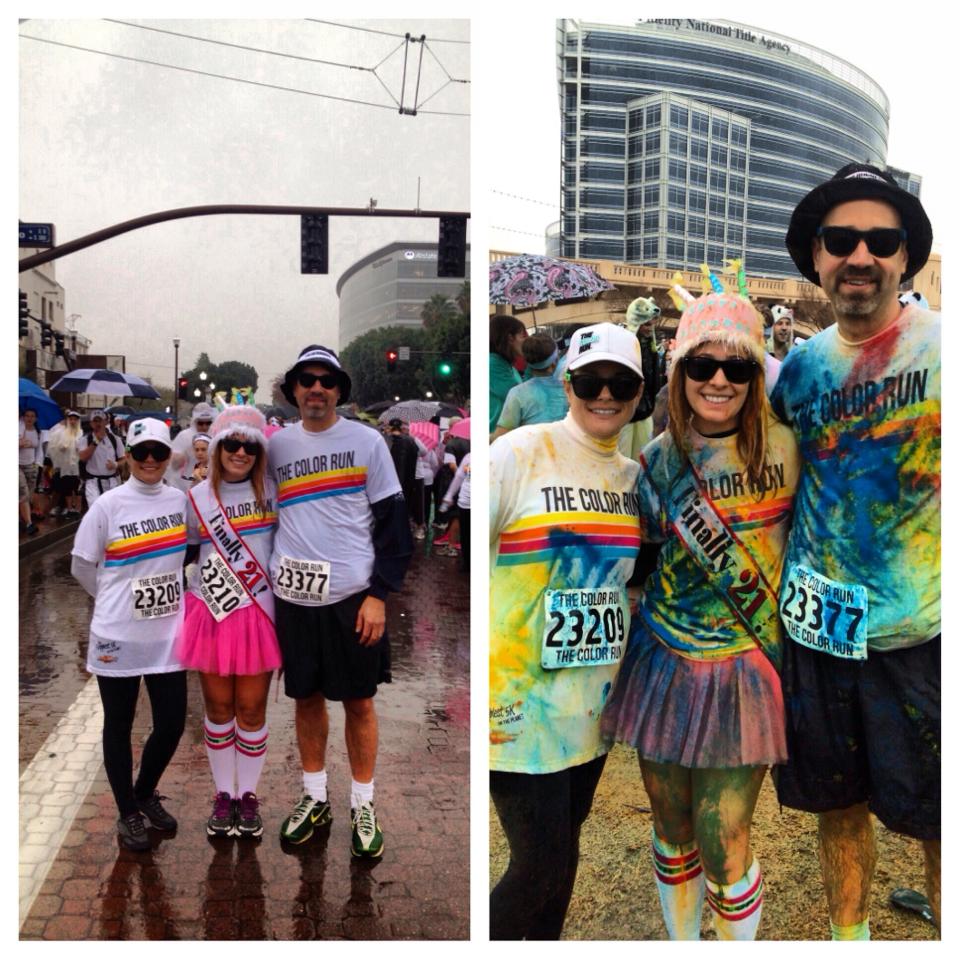
the 21st is always the biggest birthday to look forward to.  I can say it was a little weird to be able to sit at a resturaunt or buy my own bottle of wine.  I bet my family feels old considering I have always been the little Bug or annoying, nagging sister…hahah J

We started the morning off with a light—ya right a nice LONG RUN!  Of course my mom convinced me, easily, to go out to eat so that I could get carded.  We decided on BJ’s Resturaunt and Brewery obviously by the name…duh!  I order the frozen peach, got asked for my card, turned redder than a tomato, handed her my card, and was wished a happy birthday….all while my mom sat with her phone inches from my face to get a picture.  But, all that was worth it because the drink was delicious!!! And!!!! I even got a FREE, bet dad enjoyed that, FREE pizookie. 

We left and went to get pampered at our usual nail salon with manicures and pedicures.  Apparently so did the rest of the world because there was an hour wait and no seats open in a very fumy salon.  We opted to go across the street to another salon where Madre and Padre got pedicures and I got a manicure…there isn’t anything better than getting my nails cleaned up and painted my favorite dark Siberian Nights.  To round off the afternoon, we finished with some Gossip Girl (thank Wendi for getting us all addicted) and making DUCK!!!!! Yes, I made my own dinner....but I demanded they let me do it! In retaliation she stuck 21 candles into my birthday cupcake! J 

Ok, first of all, you should note that if you want to make this recipe that duck is a rare find.  Madre ended up finding the nicest guy to attend to our needs at a whole foods store.  The guy even gave us a bottle of sparkling water FREE because it was my birthday…how sweet!  Anyways, it is seared duck with a orange-cranberry gastrique.  You want to make this when it is cranberry season, which I didn’t because I’m complicated.  

Here's what you'll need:
1 cup cranberries                                     1 cup orange juice
1 bay leaf                                              4 boneless, skin on duck 
1 tbsp butter                                             breast
salt/pepper                                             1/3 cup sugar
1-2 tbsp oil                                             1 tbsp sherry or red 
                                                               wine vinegar

Here are some general rules to note in my experience of the recipe:
  1. I used raspberries in place of cranberries since it is not cranberry season.  But, beware that the raspberries break down and make the sauce runnier.  Choose a fruit that has more substance and can keep whole when heat is added.
  2. Since I used raspberries, I added more cooking wine to give the sauce more acidity.  Raspberries are sweet and you want to balance the gastrique.
  3. If using a sweeter fruit like raspberries, try using less sugar since raspberries have a natural sweetness to them plain.
  4. Do not overcook the duck because it will become tough to chew.  The 20 mins recommended to cook will be medium-rare and perfectly done.  It should be about 125-130 degrees F.
  5. When cooking the duck, frequently dump the fat juices from the pan to allow a more even and better cooking of the meat.
  6. Let the duck sit on absorbent paper before presenting nicely to guests because it will leak a little redness that might freak some people out when eating. 
Well, there you have it folks.  Go to your adventurous side and have fun making your own adjustments to this recipe.  If you’re super thrilled with it, I suggest buying Ruhlman’s Twenty and reading the interesting and thrilling ideas he has about cooking. J

Saturday, January 26, 2013

CupCaits


Well today is a wonderful day even with the rain that poured for most of the morning and afternoon.  Waking up at 6 am this morning for something other than work was a bust though…hahah J

Our motto for today?! àRain or Shine…we’ll have a Good Time.  We completed our first of many to follow Color Runs in Tempe today.  Of course, since my birthday is right around the corner, my mom had me decked out in some pretty outrageous outfits.  But that is the code of the color run, the crazier the better.  We parked about an .8th of a mile away from the start line.  By this time, it was already STILL raining so we were cold and ready to start our color explosion adventure.  We got to the start line right as they set us off which was nice because then we didn’t have to wait for everyone.


We had fun as the rain continued to pour and the color continued to run.  We were making water colors with our painted shirts hahaha…We were completely colored from head to toe and at a couple points along the way there was ankle deep puddles we had to trudge through.  We got splashed with pink, yellow, orange, and blue.  Some were more excited to color you than others.  My birthday hat and sash gave me away as a major hit bomb, so I came out really colorful.

Now, after all our showers and shampoos to clean ourselves off so we didn’t look like explosive crayons, I decided to try a new cupcake recipe for my birthday.  This yummy choice was Hummingbird cake with a cream cheese frosting.  Check out the rest of this website for tons of other yummy recipes that I plan on trying sooner or later.  I know my mom is a happy camper getting to try all these cupcakes.

Here are a few suggestions for those of you wanting to replicate this recipe:

  1. This cake is good enough on it’s own so the icing can be optional.
  2. I substituted apple sauce for the oil like always which makes a healthier cupcake.
  3. For the icing, I used Greek yogurt just make sure you use Chiobani because it is the thickest in replacement to sour cream or you’ll end up with runny icing.
  4. Stick the icing in the refrigerator if you feel that it is too runny because it will become thicker after a while.
  5. I used canned pineapple, but fresh pineapple would make a healthier and fresher taste.
  6. You can replace the nut butter with regular peanut butter.
  7. I made more than 14 cupcakes because I didn’t fill them as deep (about ½ full)
  8. Refrigerate them after making them to keep them from sticking to the paper and because they include pineapple and bananas.
  9. Microwaving the bananas works perfectly, but they only need to be in there about 45 seconds.  Let them cool before adding them to the batter, but mash them well to prevent clumps.

Now, go enjoy the rain, color, food, and adult beverages because you deserve it.  Celebrate my birthday, but putting your feet up and relaxing, as I plan to do all day tomorrow.  Be ready for a duck recipe that I plan to make tomorrow.

Sunday, January 20, 2013

BONE APPÉTIT


Happy Birthday Macaroni…2 years already have flown by since this fur ball entered into my life and boy has it been the BEST 2 years.  The smootches, snuggles, licks, and fur…I’ll take it all!!!! 


So in honor of my Noodle’s birthday today, I've decided to make it extra special with a batch of homemade treats J

Oh, and since my birthday is right around the corner, I got to use my new Kitchen Aid Mixer for the first time!!! I know most 21 year-olds ask for a mixer…mine just happens to be special and used for food instead of drinks.  Hahahaha J


Let’s start with the list of events I had planned to celebrate the big day.  First, we slept in because everyone loves sleep…right?! But of course I cannot forget the morning puppy snuggles when Roni was ready for breakfast.  I think he literally pushed me off the bed as a sign of “Time to get up!”  Then, we went to Petsmart and used a gift card and birthday money to buy some Kong treats and new booties so his paws don’t get dirty in the snow.  Best part—we stopped at Burger King and got a small cone that he pretty much engulfed in one bite (hope he didn't get too much of a brain freeze).  We took a long walk which included stopping by a nearby school playground so he could run wild and free, a given.

We settled in for the night with some extra laser pointer time, naps, and of course these delicious cookies.  Here are some of my thoughts about them:
  1. They are super easy to make and don’t require a whole lot of effort which surprised me.
  2. About 15 minutes in the oven should do no matter what they look like.  I kept mine in a little too long; hope Roni enjoys a crunch ;P
  3. I halved the recipe and used a glass jar to make my cut outs, but I found you could roll them into balls yourself and then flatter them to a desired shape.
  4. Go ahead and mix all the ingredients together because it doesn't make a difference if you whisk one before adding the rest and it save some time.
  5. Also, it makes your house smell like peanut butter heaven!!!!
  6. I tried one, yes I TRIED ONE J, and they really don’t taste like a whole lot to us, but Roni gobbled his down so apparently I did well.
 
Well all you fur lovers and food eaters, enjoy this lovely recipe and bite out of the weekend.  Feel free to change the recipe a little, but beware that the ingredients are dog friendly, unless you feel like making these for yourself.  Then, go all out! BONE APPÉTIT!

Sunday, January 13, 2013

Mugshot Cookie

A chocolate chip cookie in a mug?! Someone should call the police because we have found heaven.  Tonight my sweet tooth was craving something yummy, but I didn't want to have to make a whole box of brownies because we all know they would be devoured and then…well we can all guess (lots of workouts).  However, after a morning run and some fun yoga today to start my morning off right (although I’ll be sore tomorrow J) I decided to allow myself the reward.

So, I was so excited to have found a single serving sweet that could be easily made.  I was super nervous that it would taste funny or not work as easily as it sounded.  But, to my amazement, it works just like the recipe calls for.  It’s the perfect amount to satisfy that sweet tooth without all the guilt and the fact that it takes literally 3 minutes MAX is the best yet.
Just keep in mind:
  1. I used about half of the butter it required which didn't really make that much of a difference.
  2. I left out the chocolate chips because I didn't have them, but it still works and makes a sort of sugar cookie.
  3. The total amount is more like two cookies rather than 1 if you are strict like me and follow the serving size when making regular cookies.
  4. You can replace the flour with gluten free flour based on dietary needs.
  5. If you use Truvia, then halve the amount of white sugar to ½ a tbsp.
It’s fast; it’s easy; it’s yummy.  You have the flexibility of making all kinds of cookies and treats based on the type of cookie you like.  If you take a look at the recipe on the website you can find more yummy types of mug sweets that are easy to make.  Have fun and don’t go too overboard!!!

Saturday, January 12, 2013

Spanakopitawhat?!


Don’t get attached to these daily little tasting with the semester literally around the corner.  And I swear I am not a fatty hahah J Being another lazy day with everyone on campus coming back into the dorms I decided not to brave out into the open but cook instead.  Boy was that the best decision ever.  I tried this new recipe: broccoli spanakopita.

Now, I don’t even know how to pronounce the spanakopita nor had I ever heard of it before.  The main ingredient I had to search for aimlessly in the grocery store.  Filo dough is the crispy outer shell that the broccoli is filled into.  FYI—it’s found in the frozen bread section next to pastry puffs (thanks mom J).  This dough is very, very, very thin so be careful handling it when cooking.  Also, keep the unused sheets in the freezer so they keep longer.  Set the package or sheets that you want to use in the refrigerated at least 24 hours before hand, then before stuffing them set it on the counter covered in a wet towel.

Apparently, spanakopita is an actual food item because there is a spinach recipe on the back of the filo dough package.  Who would have thought, but I think I’m attracted to words I can’t pronounce because they sound more fun.  Oh, and this little recipe Gordon Ramsey and Top Chef would approve.


Here are some things to note about making these yummy treats:
  1. Chopping the broccoli can get messy because all the little green pieces go flying, but unless you like huge chunks :P then it is necessary to chop them small.
  2. You can replace the dish with any kind of cheese.  I used Parmesan because I already had it in the fridge and didn't want to buy a whole package of feta.
  3. Make sure to spread the broccoli mixture long when stuffing because when folding the dough if not spread it can become heavy and break.
  4. Roll the dough tightly as possible without break it and beware there is flour on them so don’t touch anything dark hahaha
  5. Use butter to your discretion.  I did not use the allotted amount; however make note that it will make the dough a little softer and tastier.  On the other hand, I liked them just as I made them.
  6. Make them and eat them relatively the same day because they don’t refrigerate the best…they’d make great appetizers if you cut the dough in half and filled them less to make 20 instead of 10 J (just alter the cooking times)
The great thing about this recipe is there are so many things that you can changed based on preferences.  The stuffing is the easiest thing to change based on what you have on hand.  This is one recipe that you can mess up and still have yummy results.  So, go and experiment with this recipe; find stuffing that you enjoy; make a party out of it because your friends and family will not get enough!

Friday, January 11, 2013

The Mess About Gnocchi


This recipe is not for the weak at heart or the super clean freaks.  Be warned that it gets very messy which only goes so much better with blaring Mumford & Sons on Pandora. J Michael Ruhlman brought up a good point in his twenty rules by summarizing how cooking can be a way to empty your mind.  I guess this is why I love to cook when I am bored or annoyed because it gives my mind something else to focus on. 

Mise en place literally means “put in place” or “organize and prepare.”  A mandate in the ethos of mise en place is to remove obstacles in your way, not only the junk on the counter that isn't necessary while cooking but the many thoughts that continuously popup in your mind.  In a way you could say cooking is like yoga for the hungry…haha J

So, this attempt is at making gnocchi.  These little potato bites are not only delicious, but I smile every time I eat one because I know the hard work that literally went into making them.  From the stickiness of the dough all over my hands to Macaroni looking at me like a crazy person because flour is literally everywhere, it is an interesting experiment…hahaha.
 
Again, I don’t think it was a total success, but a very good first attempt.  Although, it would not have made me win Top Chef, I’ll still enjoy them and keep these changes in mind for next go around.
  1. The recipe makes quite a bit of gnocchi which you can freeze as dough and then boil later, but for those of you brave enough to try it I’d suggest halving it.
  2. The mashing of the potatoes is important.  If you’re like me, mashing them by hand, then you’ll just have to deal.  But, next time I’d blend or food process them to create a smooth and creamy texture.
  3. Flour is key!!!! Use as little flour as possible in the dough because too much flour makes the dough too soft.  Plus, flour gets added when rolling the dough into rolls.
  4. Don’t overcook or under-cook the pasta.  This is where I struggle because the size of the gnocchi can sometimes vary making the cooking time temperamental; ergo, try to keep them all the same size and taste testing along the way J 
 Now, fly my minions fly :P  Not only is cooking great to heat the apartment, but it fills your tummy as well.  YUM!!!! Let me know if you find any other helpful hints and I encourage you to try this recipe out.  These little fluffy potato noodles are yummier than those you’ll get at a grocery store and healthier than those at Olive Garden. BON APPÉTIT!

Wednesday, January 9, 2013

Welcome to Random


So…a new year and a new goal—random recipe on a random day.  The only stipulation?! It has to be at least once a month, but knowing me J I’m sure you’ll be indulging, at least metaphorically, quite a bit.  It all started with my sister, JP, asking me about her idea of cooking a different loaf of bread each week.  That, my friends, is A LOT of carbs.  So, loving to cook myself she asked if I had any good alternatives.  Obviously, she didn’t take my idea so I stole it back, called dibs, and wrote myself the rights to it.  Now along with the 20 pounds I’ll probably gain from this experience, you can come along and get my peanut gallery commentary as I tackle various recipes for the next year.  That’s at least 12 in total, but I have my eyes on so many, as some may tell by my obsessive “pinning” on Pinterest! J It the organizer of Facebook… :P


Now, on to the good stuff...literally.  This is a recipe that I have made a few times before, but I consider it a good start because it has a few twists that make it new—another rule of mine on this journey: no recipe can be used that I have already made unless altered in some way.  I give “ cu-toes” to SkinnyTaste.com from her lovely recipes that I constantly steal and force upon my family.  The one that follows is what she calls “Chicken and mushrooms in agarlic white wine sauce.” 

The twist I added, or more like the grocery store added since they didn’t have all the necessary ingredients, was to use chicken breast in place of chicken tenderloins.  It’s a pretty big difference, literally, considering the size of a chicken breast versus tenderloin.  Ergo, I decided to cute the breasts in half, but even so they were still larger and therefore, took longer to cook.  Also, it meant a bigger mess for my mom (hahha) to clean.  Some hints for those of you that may try to make this later:
  1. I prefer gluten free flour not only because it is healthier, but it tends to stick better as an outer crust than regular flour.
  2. Breast take a lot longer to cook and are juicier which can cause your flour to get soggy…in Hell’s Kitchen Gordon Ramsey might throw it back at you L
  3. Keep the chicken and sauce separate unless eating right away because the chicken can become soggy from the sauce.
  4. Use a sweeter white wine for a sweeter meal of course and a tart one for a tarter meal…It can enhance or decrease the taste in blandness so don’t skimp on the booze.
  5. Lastly, you can substitute chicken and vegetable broth based on preferences.  I tend to find the vegetable broth to give it a more well-rounded flavor.
 
I know, I know I corrupted my mother into buying wine, but in return I had to cook her favorite meal.  I believe it is an even trade.  Well, it seems pretty simple in this recipe about my thoughts; however, it plays into part that I’ve made it a time or two before.  I did come to the conclusion that I would be a horrible contestant on a cooking show because I become a complete spaz in the kitchen from my impatience of cooking chicken to my inability to handle my multitasking with calmness.  I guess the smell of food does drive me crazy…seems Macaroni got that gene from me hahaha J

Well, until the next time I either have a rough day or am bored senseless you’ll have to experiment with this yourself and let me know if you find any good alterations.